How To Make An Envelope Out Of Scrapbook Paper
/Learn how to make beautiful envelopes out of scrapbook paper using an existing envelope as a template. It's a budget-friendly and eco-friendly way to send personalised greeting cards and letters to your loved ones.
Who needs store-bought envelopes when you can create your own?
This page contains affiliate links. This means that if you make a purchase after clicking a link I earn a small commission but it doesn’t cost you a penny extra!
DIY Scrapbook Paper Envelopes.
Today, I want to share a super fun project with you: making envelopes out of scrapbook paper! It's a fantastic way to add a personal touch to your snail mail and surprise your loved ones with a custom-made envelope.
And the best part? We're going to use an existing envelope as our template.
I absolutely love making envelopes this way. It's a simple craft that allows you to use up any scrapbook paper you might have left over as well as reuse old envelopes.
Plus, it's a fantastic way to add a personal touch to your snail mail.
Paper Envelope DIY.
I love getting snail mail. Who doesn't? Knowing that someone is thinking of you, wants to say hi and has gone that extra mile to let you know is a great feeling. Homemade scrapbook paper envelopes can make it even better.
This sweet and simple craft project is a great way to brighten up someone's mailbox and their day.
Supplies:
Scrapbook paper - Choose a design that speaks to you! It could be a vibrant floral pattern, a cute polka dot print, or anything else that catches your eye.
Existing Envelope - Reuse an old envelope making sure it fits your letter or card.
A Pencil
Scissors
A Ruler
An Eraser for removing any unwanted pencil mark
An Embossing Tool
A Cutting Mat
Double-Sided Tape - We'll be using double-sided sticky tape to secure our envelope together. It's easy to use and won't make a mess.
How To Make Homemade Envelopes Out Of Scrapbook Paper.
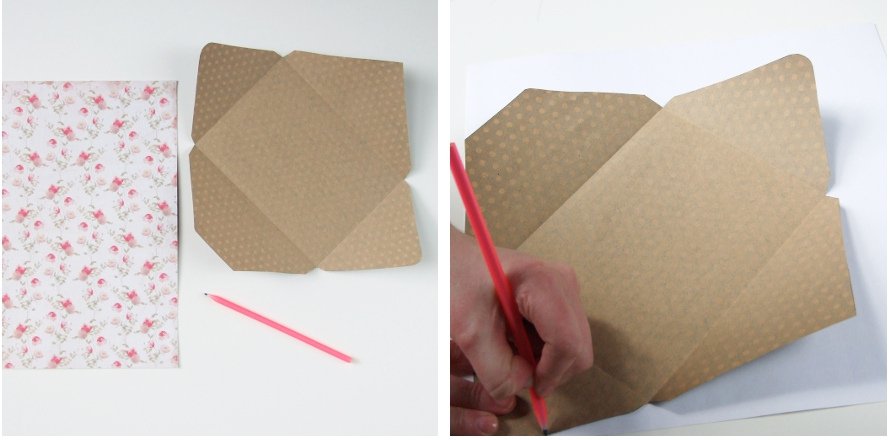
1. Take the envelope you're going to be using as your template and open it up. Trace around your template on the reverse of your scrapbook paper.
2. Carefully cut around your traced shape. Don't forget to keep the left over paper scraps.
3. Once you've got your envelope cut out you want to use your embossing tool and ruler to score a line at the base of each flap.
You don't have to do this but it will make folding the thicker scrapbooking paper easier if you do.
4. Crease and fold up the four sides.
5. Now you've got your envelope scored and folded, add two strips of double sided tape to the side flaps, peel off the backing tape and fold up the bottom flap pressing down firmly.
If you don't have any double sided tape you could use glue but be careful when applying it. I used glue in my practice run and applied too much.
It spilled out over the edges and glued the inside of my envelope together. Not good.
6. Take your left over scraps of paper and cut them into rectangles. We're going to use them as mail labels.
7. Stick them down using more double sided tape or glue.
8. If you're using glue you may need to leave your envelopes overnight to dry.
Press them between a couple of sheets of paper and some heavy books to help them dry flat.
9. Now, it's ready to be filled with a heartfelt letter, a cute card, or perhaps some homemade goodies.
Seal it up with a sticker, a piece of washi tape, or even a wax seal for that extra touch of personality.


