Easy Origami Pumpkin
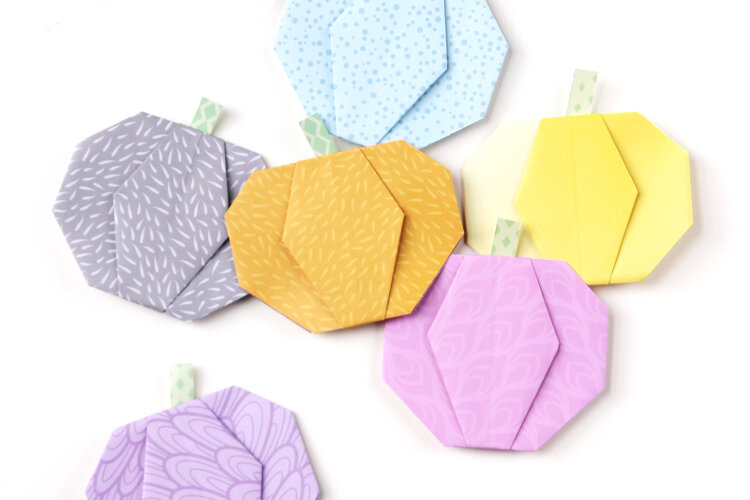
/Autumn isn’t Autumn without a pumpkin or two. Learn how to make easy Halloween origami pumpkins with this step by step tutorial.
They’re a cute way to add a simple paper decoration to your Halloween and Fall decor. No special skills needed plus they’re super fun to make for both adults and kids.
Why not get folding and welcome Fall with a pretty paper pumpkin garland?
This page contains affiliate links. This means that if you make a purchase after clicking a link I earn a small commission but it doesn’t cost you a penny extra!
DIY Origami Pumpkin.
Autumn is here and I've got the perfect paper project to decorate your home with, an origami pumpkin garland. These little pumpkins are so much fun to make and super easy to boot. They’re a great Fall and Halloween craft that will keep both kids and adults entertained all day long.
If you’re a fan of a good garland then you’re going to love this one. It’s such a simple and inexpensive way to dress up a room. And as this one is pumpkin-themed it'll work just as well for Autumn and Thanksgiving as it will for Halloween.
String them up to spruce up a mantel or window or make a whole bunch of them in different sizes to decorate a table. Make them as big or as small as you like. I mean, how good would a giant pumpkin stuck to a wall or door look?
And make sure to check out my 3D Paper Pumpkins for more pumpkin goodness or these 25 Halloween origami crafts.
Choosing the paper.
Mix up the papers and patterns to change the look. There’s white, cream and gold for a spooky-chic vibe, orange and brown for a more traditional feel or maybe even some sparkly glitter papers if you want to add a touch of glam. Whatever takes your fancy.
I’ve never been a big fan of traditional Fall colours so I’m always excited when I get to introduce some more pretty pastels into my Halloween decorations. I went for some pretty pastel patterned papers which are actually meant to be used to make origami animals in the Fold Yourself Calm Origami book (sadly no longer available).
Who says Halloween has to be black, green and orange, right?
If you’re new to origami make sure to check out these 3 Basic Origami Folds For Beginners.
Assembling your paper pumpkins.
These origami pumpkins are really simple to put together. You’ll find the step-by-step tutorial below. The main body of the paper is made by folding a single square of origami paper but you will need some extra paper and glue to make the stalks.
Once you’ve folded your pumpkin you need to cut small strips of paper for the stalks. I like to use double-sided tape (these adhesive rollers are great) as it’s mess-free and won’t buckle your paper as runny school glue will. If you’re making them with little kids glue dots also work well.
Supplies:
Origami Paper (this is a great basic pack with a wide range of colours for beginners)
Scissors
Double-sided Tape/Glue Dots or Paper Glue for the pumpkin stalks
Want to make it even easier? You can download and keep this tutorial in a handy PDF here.
This project is also available as part of my Easy Origami Projects PDF eBook. You can find it in the shop along with the rest of my printables and templates.
How to make Easy Origami Pumpkins.
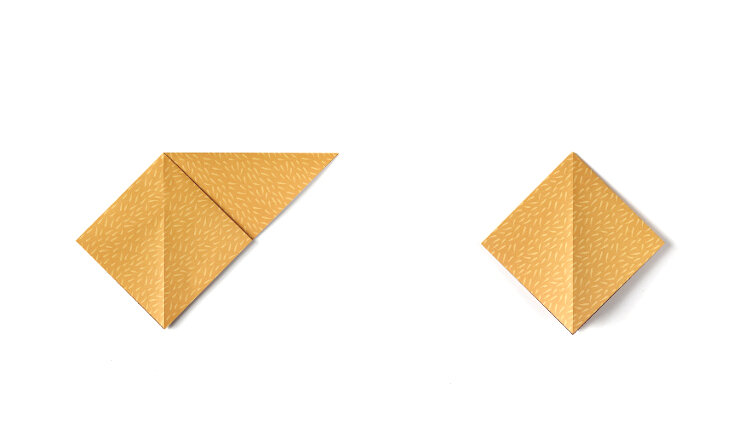
1. Fold your paper in half along the diagonal.
2. Fold in half again.
3. Open up the top triangle and press flat to form a diamond.
4. Flip your paper over and do the same on the other side.
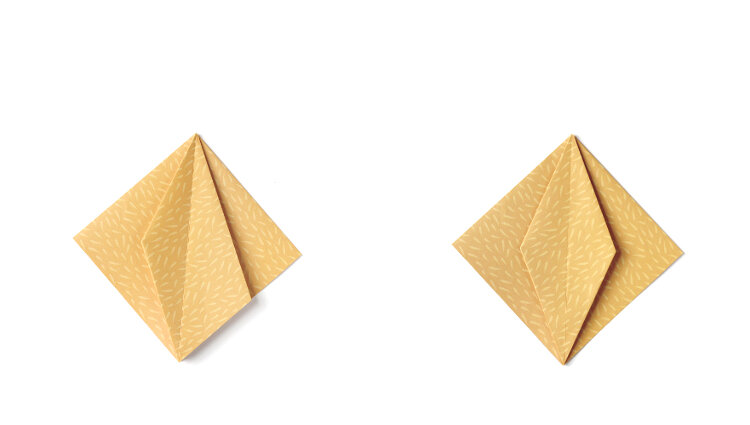
5. Take the top flap on the left and open it out to the right.
6. Fold the flap in half to meet the centre crease.
7. Turn the same flap back to the left and press flat.
8. Repeat on the other side.
Take the right flap and open it out to the left.
Fold in half to the centre.
Turn the same flap back to the right and press flat.
9. Take the left flap and fold in half to the centre again but his time from the bottom up. Fold it back to the left.
10. It should form a slim triangle shape in the middle.
11. Repeat on the opposite side to make a slim diamond shape in the middle.
12. Flip your paper over and fold the top and bottom points down.
13. Do the same for the left and right sides to give your pumpkin a rounded shape.
14. Cut a thin strip of green paper for the stalk. Stick to the back using adhesive.
15. Repeat to make as many pumpkins as you need.
16. Attach your finished origami pumpkins to some string and hang.
More Halloween Origami and crafts to keep you busy:
Make sure to check my other Halloween crafts and recipes for more spooktacular DIYs.


