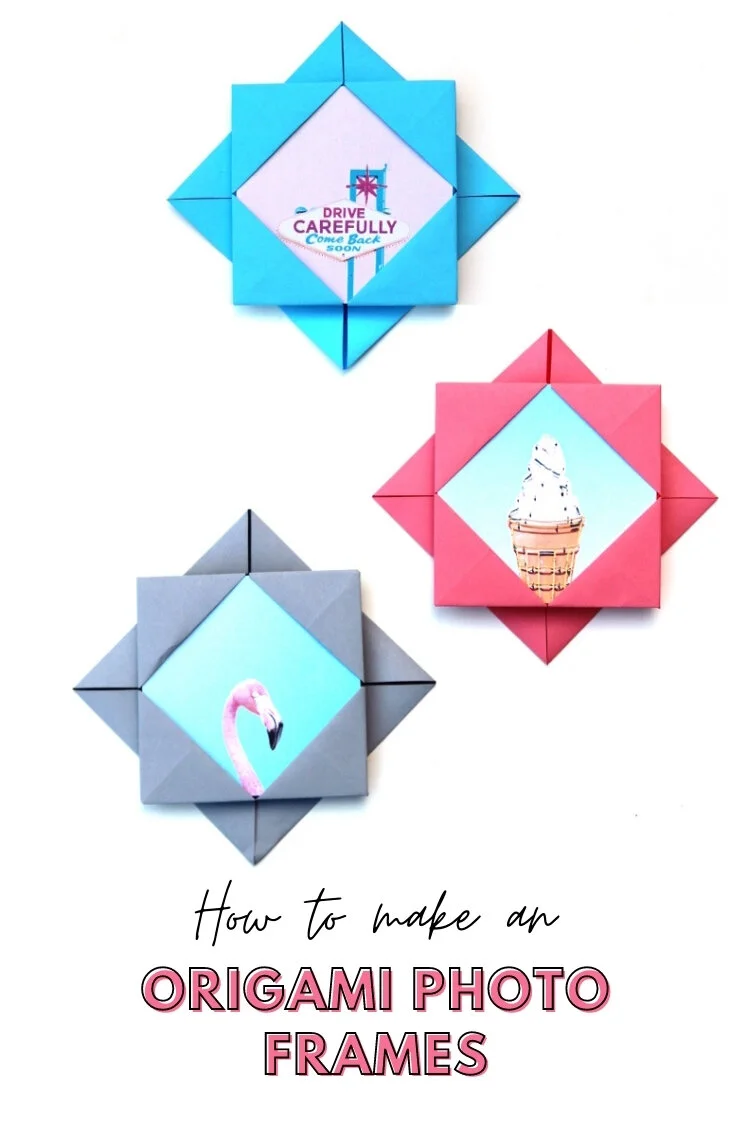
How To Make Origami Photo Frames
/Want a quick and easy way to display your favourite photos? Learn how to fold this simple origami photo frame.
This paper picture frame can be folded in a flash and is a super cute way to display a small photo or give as a gift.
With only a square of paper and a few simple folds, you’ll have a handmade picture frame to help showcase those precious memories.
This post contains some affiliate links for your convenience (which means if you make a purchase after clicking a link I will earn a small commission but it won’t cost you a penny extra)!
Origami Photo Frame.
I've got a fun little origami project to share with you today. If you like to display photos around your home or like to scrapbook, learning how to make one of these mini origami picture frames is a great idea.
These cute little frames are the perfect project for beginners. I’ve made a simple step-by-step video tutorial to show you exactly what to do, so don’t worry if you’re not sure where to start.
Don’t let your photos gather digital dust. Print them out and pop them in one of these frames. Use them as gift tags, scrapbook page decorations or pop a magnet on the back and display them on your fridge.
Keep reading for the full origami instructions below.
Picture Frame Origami.
I made these frames using origami paper but if you want to give them as a gift you could use thicker paper or even a thin cardstock like scrapbook paper to make them sturdier. You can get scrapbook paper in most craft stores and it has the added bonus of coming in a range of patterns and colours.
These flower-like frames look like two squares stacked on top of each with a diamond shape inner pocket. This pocket is where you can tuck your photo inside.
I love the idea of using them in an album or scrapbook as a fancier version of a photo corner. Or like in this cute DIY from Handmade Charlotte where they used similar origami frames to make a large piece of wall art.
They’re a simple but effective project that is easy to master. Once you’ve had a bit of practice these little frames can be folded up in a flash.
Supplies:
Bone Folder or Butter Knife
Glue Stick
Photo
I recommend using origami paper for any paper folding project but any kind of thin paper will work. Here are a few alternatives that you probably already have on hand.
Regular Printer Paper,
Magazines,
Old Books,
Maps,
And Newspapers.
I even have some printable origami paper you can download and use for FREE. Simply download, print and cut into 7x7-inch squares. Click the image below to get yours.
Origami Photo Frame Step By Step.
1. Start by taking a piece of origami paper and folding it in half along the diagonal.
2. Open out and fold in half along the opposite diagonal.
3. Take one of the corners and fold it to meet in the centre.
4. Repeat and fold all the corners into the middle.
5. Open back out.
6. You should now have four creases with a square in the middle.
7. Take one of the corners and fold in to meet the crease you just created.
8. Repeat for the rest of the corners.
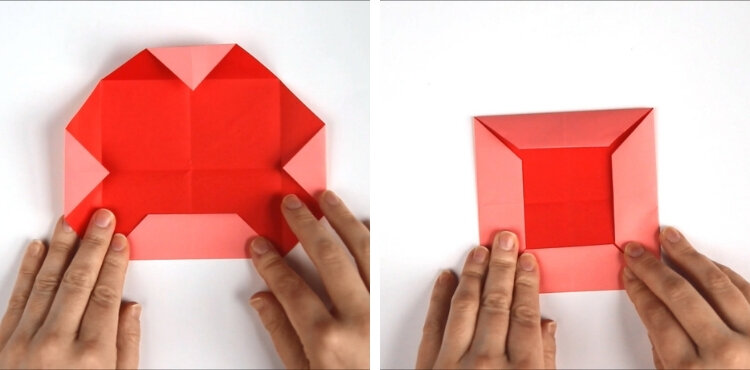
9. Take one of the sides and fold in along the previous crease.
10. Repeat for the rest of the sides.
11. Flip your paper over and fold each of the corners into the centre again.
You may need to use a bone folder or the edge of a butter knife to get a nice crisp fold.
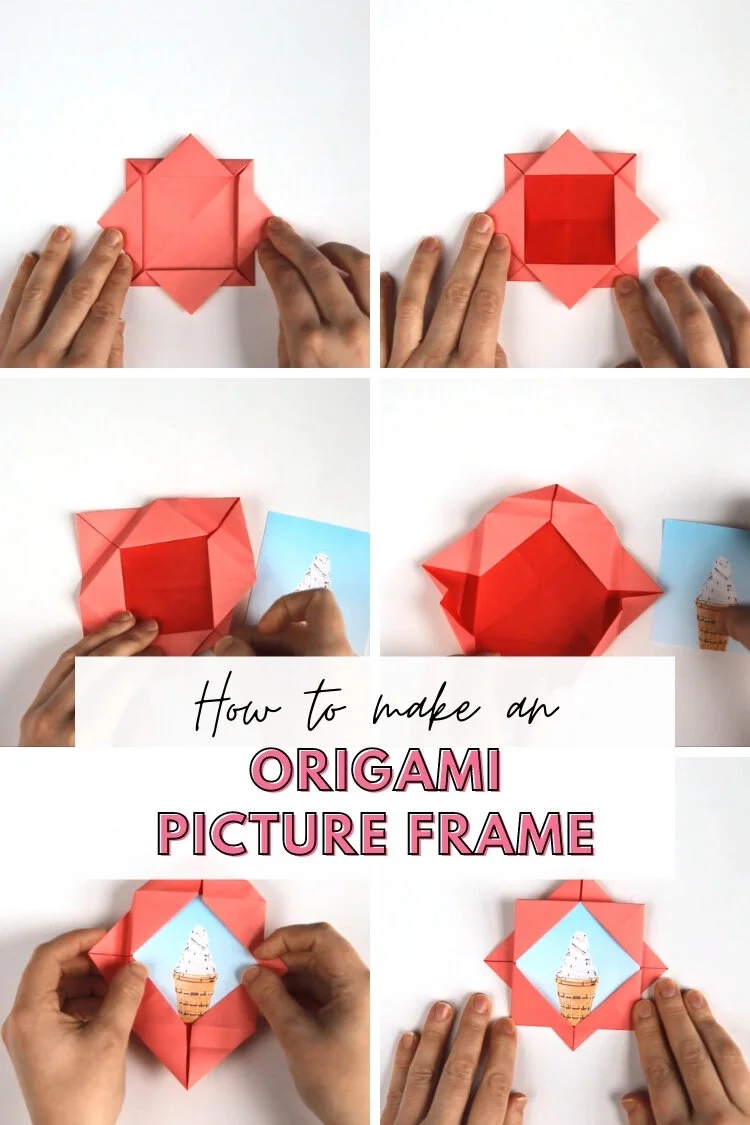
12. Take one of the corners and fold back out so the point sticks out over the edge.
13. Repeat for the rest of the corners.
14. Flip your paper over.
15. Trim your photo down so they fit the frame.
16. Open out the frame and place the photo inside.
You may need to use a little glue to hold it in place.
17. Fold the frame back into position.
18. If your frame doesn’t sit completely flat you can try running a bone folder over the folds to help or use a little glue to hold them in place. Although using glue does mean you won’t be able to swap out the photo.
Easy, right? In no time at all, you can have a collection of inexpensive pretty frames to display your photos.
Need a bit more help? Not sure of a step? Check out the video below.


