Wooden Bead Star Ornament
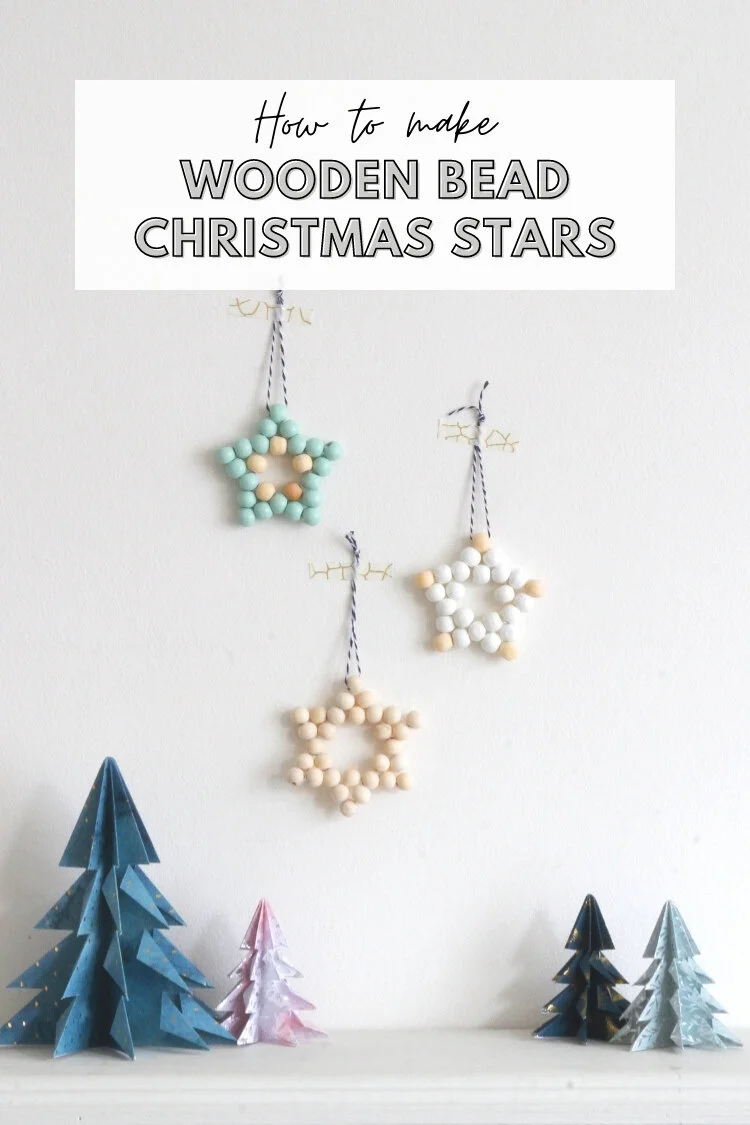
/Deck the halls with these simple diy wooden bead star decorations. They make the prettiest decorations to hang on your tree and with a bit of practice you’ll be able to make one in just a few minutes.
This page contains affiliate links. This means that if you make a purchase after clicking a link I earn a small commission but it doesn’t cost you a penny extra!
Wooden Bead Star Ornament.
Handmade Christmas decorations are a big deal around here. Every year I like to make a new decoration to hang on the tree. It’s one of my favourite things.
So far we’ve had DIY clay star decorations, Watercolour Clay Decorations and DIY Clay Christmas Decorations.
My latest edition and my most favourite so far (shh, don’t tell the others) are these lovely Scandinavian-inspired wooden bead stars. I’ve always thought that a tree can never have too many ornaments but sadly this year it finally happened. We ran out of branches!
As our tree is a tad full my backup plan is to try and squeeze one on and use the rest as gift toppers. Don’t you think they’d look great tied around gift bags?
They also make wonderful keepsakes and gifts themselves so hopefully, a couple of them might even find a new home on a not-so-crowded tree.
Here’s how to make them.
SUPPLIES:
Clear Elastic Stretch Thread (used in bead crafts and jewellery making)
Needle
Scissors
Baker’s Twine or String
How To Make A Star Out Of Beads.
To make a 6 pointed star you’ll need 30 beads. To make a 5 pointed star you’ll need 25 beads.
1. Cut a long piece of clear elastic. Around 2 metres or 2 and half feet if you’re using 10 mm wooden beads like I did. The larger the beads the more elastic you’ll need.
I used jewellery making clear elastic to make my stars but you could use twine, wool or wire to make yours. I like to the use the elastic as it’s slightly stretchy and doesn’t show through in between each bead but it’s only a personal preference and totally up to you what you use.
2. Thread the elastic through a needle and knot both the ends to make a double thread.
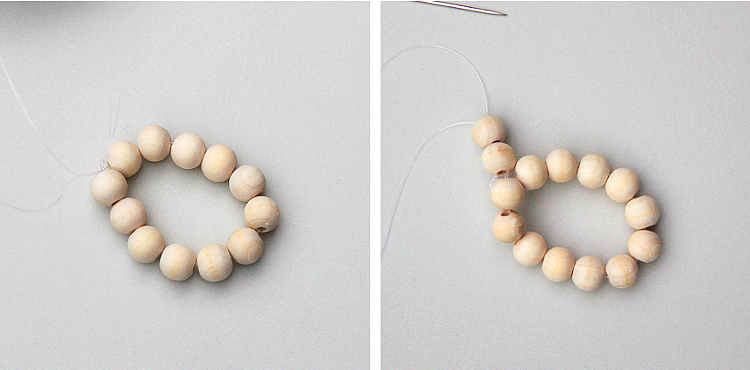
3. Thread on 12 beads (10 for a 5 pointed star) and then thread the needle through the knotted end to create a closed loop.
4. Thread on 2 beads.
5. Skip the next bead and thread the needle through the next bead along.
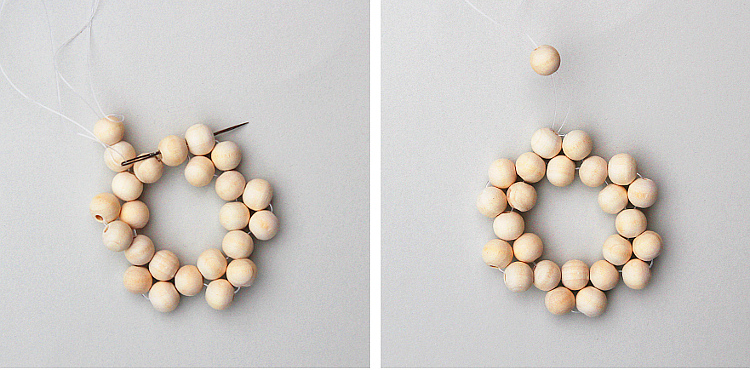
6. Repeat another 5 times (4 on a 5 pointed star) until you reach the starting point.
7. On the last point you need to thread the needle through 2 beads (see pic above) so you can begin to attaching the final beads.
8. To make the tip of each point thread on a single bead and then thread the needle through the next 3 beads.
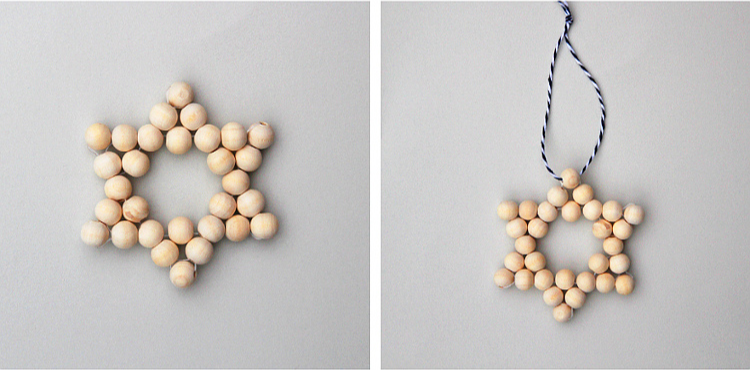
9. Repeat for the next 5 points.
In the photo above I’ve pushed the needle through all 3 beads at once so you can clearly see what to do but depending on what elastic or twine you’ve used it might be easier to go through each bead individually.
6. Thread through the last bead and knot.
You can either hang your star from the remaining elastic or trim away the excess and attach some baker’s twine or ribbon to the top to hang your star by.
This was such a simple yet satisfying craft project to make. At the beginning it can seem quite fiddly and time consuming but once you get going they’re really not that difficult to make. I can’t wait to try and squeeze a couple on the tree!


