DIY CITRONELLA CANDLES OR HOW TO TURN JUST ABOUT ANYTHING INTO A CANDLE INCLUDING MUGS AND EGG CUPS.
/Make your own citronella candles using bowls, mugs, egg cups or whatever else you have to hand. Perfect for keeping those pesky bugs away at your next outdoor event.
Please note the above links are affiliate links. This means that if you purchase through them I receive a small commission.
DIY Citronella Candles.
One of the best parts about summer is getting to eat outside on those warm balmy evenings. The worst part is being surrounded by bugs as soon as you step outside. Since the weather is still nice and warm here I thought it was about time I made some citronella candles to help keep those pesky bugs at bay.
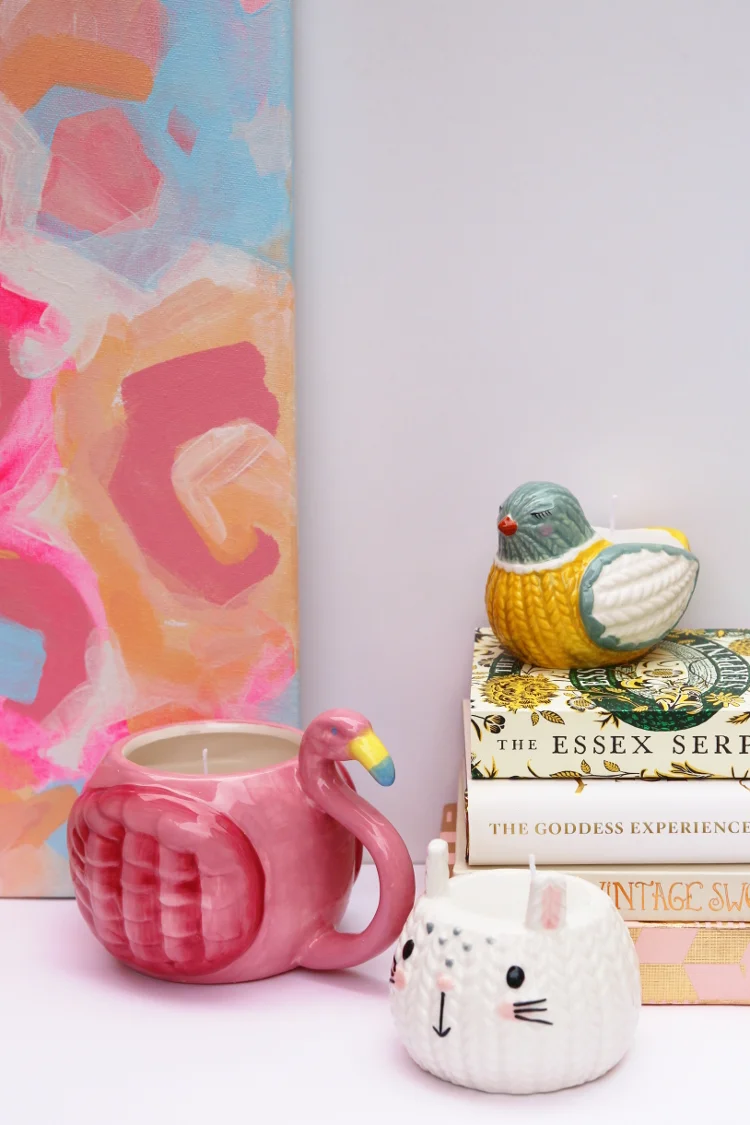
Instead of using a jar or terracotta pot I thought it would be fun to make some cute novelty candles using these adorable knitted effect rabbit and bird egg cups and this amazing giant flamingo mug I picked up from Asda last week. I mean, how cute is that bunny face? I couldn't resist.
I haven't made candles since I was kid but it turns out it was much easier than I remember. Probably because last time I made them I was too young to be handling hot wax on my own and had to get my dad to help.
I had a kit that was really similar to this and I remember making a lot of candles in all different colours. Making these candles is even easier as all you need is a mug or other containers like a bowl or egg cup and you're all set. Here's how to make them:
Supplies:
Novelty Mugs or Egg Cups (I got the flamingo mug from Asda as well as the knit effect rabbit and bird egg cups)
Natural Soy Wax (500g was enough to fill the 2 egg cups and 1 large mug)
2 Saucepans (one you can pour from) / A Saucepan and a heat-proof bowl you can pour from / or a Double Boiler
Some Pencils
Scissors
And some newspaper to cover your work surface.
I know buying all the supplies to start a new project can be expensive so if you don't fancy buying everything separately, here's a handy candle making kit that contains everything you need to get started. All you need to do is add the essential oil of your choice.
How to start melting your wax.
1. Fill a saucepan half full with water and heat. Place the second smaller saucepan on top or if you're using a heat proof bowl place that carefully on top. The bowl needs to be bigger than the saucepan so it's sits safely on top. Alternatively you can use a double boiler to melt the wax.
2. Add the soy wax to the bowl or smaller saucepan and heat gently.
3. Take the wicks and measure them against the inside of your mug or egg cups. You need them to be 3/4 cm longer than the height of your mug. To keep your wicks upright wrap the wicks around a pencil and make sure it will rest on the rim of your mug.
4. Once the wax has completely melted take your wicks and carefully dip the metal tab into the wax. Let it cool slightly and then press to the inside of you mug or egg cup. As the wax cools it should hold your wicks in place for the next steps.
5. Add a few drops of the citronella oil and stir to blend well. The oil will look cloudy to begin with so stir until it disappears.
Pouring the wax.
Make sure you have newspaper down to protect your work surface as this next bit can get messy.
5. Pour your melted wax into your mug or egg cup. If you haven't get a saucepan with a lip to pour from a pouring pot is a good alternative or you can decant your wax into a smaller heat proof glass like I did.
Pour as slowly as you can as this will prevent any air bubbles forming in the wax.
Fill just below the rim. As the wax sets a well can form around the wick so make sure to keep some of the wax to top up later.
6. Let cool and top up any wells with the remaining wax. You may need to re-heat your wax.
7. Leave to cool. Depending on the size of your candle this can take up to 10 hours.
Trimming the wick.
8. Once completely cool remove the pencils and trim the wick.
Even though the wax should set in around 10 hours I'd recommend leaving the candle to cool for a full 24 hours before burning to fully cure. Curing lets the fragrance have time to bond with the wax and means you should get a stronger scent.
What do you think? Adorable, right? And they were such fun to make. I think a giant flamingo candle would brighten up any outdoor space, don't you?


