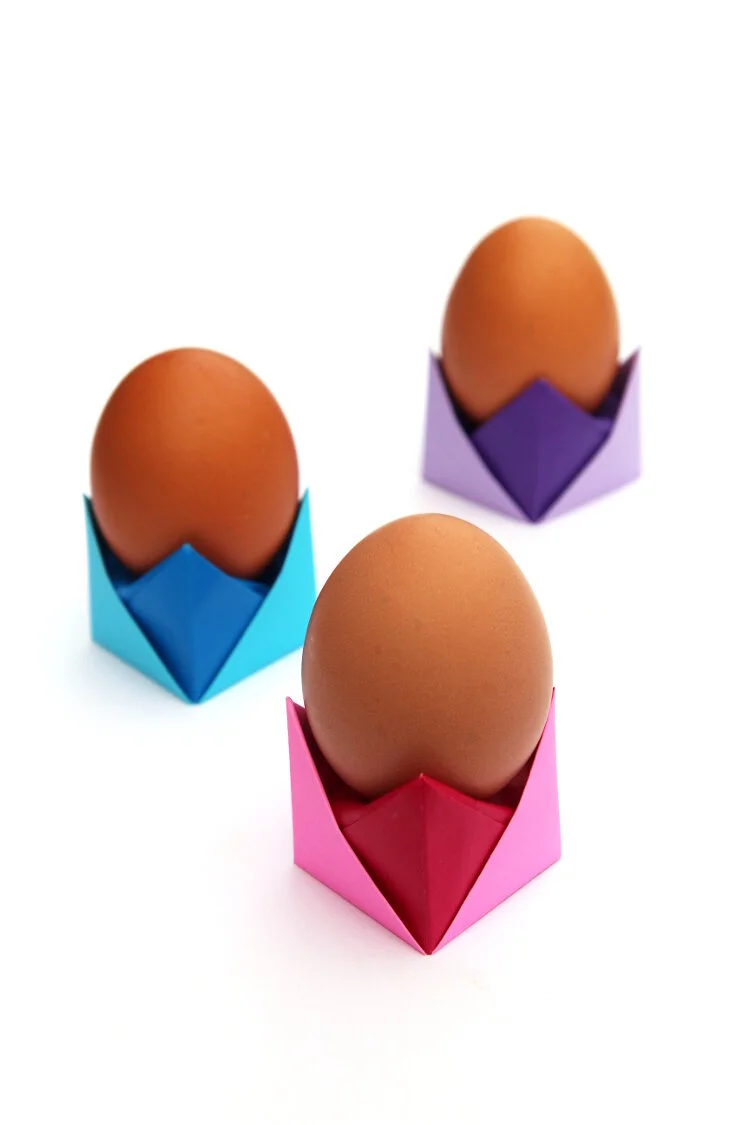
DIY Origami Egg Cups
/Ever wondered how to make an Easter egg cup? Then look no further.
These origami egg cups are such a cute paper craft to make with the family. Each one can be folded in under a minute with a little practice.
Fill them with decorated eggs or chocolate ones and use them as adorable handmade table decorations.
Super quick and easy to make. Simply follow along with the video tutorial below.
This page contains affiliate links. This means that if you make a purchase after clicking a link I earn a small commission but it doesn’t cost you a penny extra!
This post was originally shared in 2016 but has since been updated.
Origami Egg Cups.
Easter crafts are some of my favourite origami projects to make. If you’re looking for a way to decorate your brunch table this Easter then try these adorable paper egg cups.
You don’t need any special supplies or skills. A few paper folds and you’ll have a cute paper egg cup (sometimes called an egg holder) for your Easter table.
They’re such an easy craft they can be folded in under a minute once you’ve had a bit of practice. As they’re so simple they’re a good one to get kids involved with especially if you’re looking to keep them entertained over the Easter holidays.
Fill them with decorated eggs or chocolate ones and write your guest’s name on each egg cup for an adorable handmade table decoration. A must-have for any Easter gathering.
Supplies:
Origami Paper (these contrasting colour ones from Folded Square would look fantastic)
I recommend using origami paper for any paper folding project but any kind of thin paper also works. Here are a few alternatives that you probably already have on hand.
Regular Printer Paper,
Magazines,
Maps,
Old Books,
And Newspapers.
I even have some printable origami paper you can download and use for FREE. Simply download, print and cut into 7x7-inch squares. Click the image below to get yours.
How to make Origami Egg Cup.
1. Take a 6 inch square of origami paper and fold it in half to make a rectangle.
2. Fold the paper in half again to make a square and then open it back out to a rectangle.
3. Take the right edge and fold to meet the center crease.
4. Repeat on the other side before folding both sides back out.
5. Open out the right-hand side.
6. Press down to make a triangle.
7. Repeat on the left-hand side.
8. Flip the paper over.
9. Fold the right edge in to meet the center fold.
10. Repeat on the left-hand side.
11. Fold the bottom right corner up to the center.
12. Repeat and fold the bottom left corner up to the center crease to make an upside down triangle.
13. Flip the paper over and repeat steps 10 and 11.
14. Fold the top triangle up to meet the top of the paper.
15. Flip the paper over and repeat on the other side.
16. Open out from the bottom to start forming the base.
17. Press down in the middle to form the cup.
18. Place your egg in the cup and display.
Need a bit more help? Scroll down for the video tutorial.
What do you think? Easy peasy, right?
I make a few of these every Easter and it still amazes me how a few simple folds can turn a piece of paper into something strong enough to hold an egg.
And of course, you don’t have to just use them as egg holders. They also make fun place cards. Write a guest’s name on an egg using a Sharpie (these metallic gold and silver ones are pretty).
How will you be displaying your eggs this Easter?
Want more Easter Origami? Check out my other paper crafts including bunnies, eggs and baskets.
Origami Easter Bunny Baskets (not for the faint-hearted!)


